Ever Felt Like a 3D Printing Wizard…or a Muggle?
Remember the first time you stumbled upon a 3D printer? It was like discovering a portal to Hogwarts, wasn’t it? One minute you’re a mere muggle, and the next, you’re on the brink of conjuring up everything from Batman figurines to fully operational cookie cutters. But then, reality hits. You realize that before you can summon anything into existence, you need to speak the arcane language of 3D printing: turning OBJ files into G-code. And suddenly, you feel less like Dumbledore and more like he-who-must-not-be-left-alone-with-a-3D-printer.
But fear not, dear aspiring wizard of the 3D realm! The journey from befuddlement to mastery is fraught with trials, errors, and a bit of magic—specifically, the kind conjured up by Cura, the slicing software that’s about to become your trusty wand in the world of 3D printing. So, grab your digital cloak (and maybe a coffee), and let’s embark on an adventure into the mystical land of Cura-ting perfect prints, where OBJ files transform into G-code masterpieces faster than you can say “Quidditch”!
Why Choose Cura Over Other Slicing Software?
Well, first off, it’s free! In a world where the best things are said to cost your first-born or at least a sizable chunk of your wallet, Cura stands out by being as free as a bird—or, in our case, as a free 3D model ready to be printed. It’s like stumbling upon a chest of gold in your attic; except this chest turns your creative designs into tangible objects.
But the real kicker? Cura is user-friendly. It’s designed for both novices who might get dizzy at the mere mention of “slicing settings” and seasoned pros who tweak their printer settings for fun on a Saturday night. Whether you’re looking to print a simple Gotham Guardian to watch over your desk or embark on a complex project that requires precise control over every print layer, Cura has got your back.
Getting Started with Cura
Feeling ready to take the plunge? You can join the league of extraordinary printers by downloading Cura right here. It’s like enrolling in Hogwarts, but instead of a letter, you get a download link, and instead of a wand, you wield the power of advanced 3D printing technology right from your desktop.
So, pour yourself a cup of that other cura if you must, and let’s get ready to turn those digital dreams into 3D printed realities. With Cura as your guide, you’re well on your way to mastering the art of 3D printing, no magic wand required (though, let’s be honest, that would be pretty cool).
Importing OBJ Files: A Quest or Just a Click?
So, you’ve downloaded Cura, installed it with the excitement of a kid on Christmas morning, and now you’re staring at its interface wondering, “What in the wizarding world do I do next?” Fear not, for importing your OBJ files into Cura is less of a quest fraught with peril and more of a…well, click.
The Magical Import Button
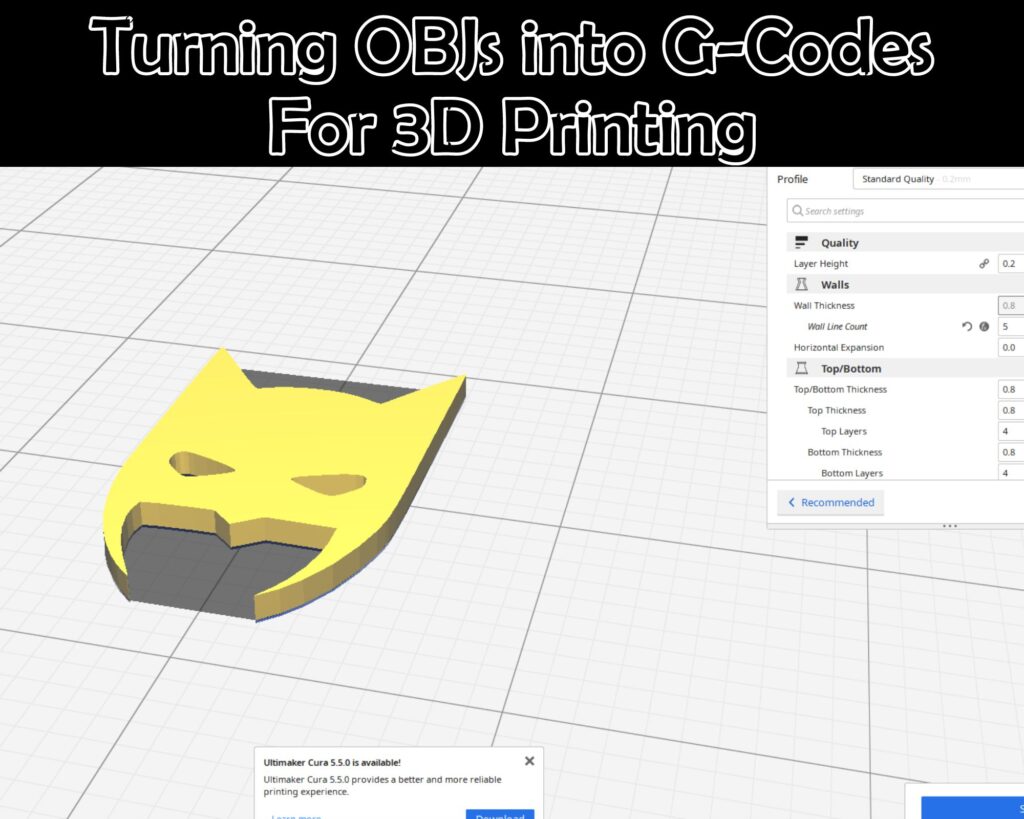
Finding the import button in Cura is like spotting the Room of Requirement in a time of need—it’s there when you truly look for it. With a file as ready as a Perfect Outlet Hole Maker lying in wait, importing is as simple as navigating to “File” > “Open Files…” or dragging and dropping your OBJ file directly into the Cura interface. Abracadabra, your digital model now graces the virtual build platform, ready to be sliced and diced into printable G-code.
But Wait, There’s More!
Sure, importing your file might seem as straightforward as a Hufflepuff’s path to the dining hall, but there’s a catch. Not all OBJ files are created equal. Some might come to you as sprawling digital behemoths, too large or oddly oriented for practical printing. Here’s where Cura’s toolkit comes into play, allowing you to scale, rotate, and even mirror your model with just a few clicks. Imagine turning your Easy-to-Use Circle Drawing Tool model into the perfect size for your needs, all with the casual ease of a wizard brewing a morning potion.
A Note on the Dark Arts (AKA Troubleshooting)
Sometimes, the import process can go as awry as a mispronounced spell, leaving you with errors or a model that looks more like it’s been cursed rather than crafted. Common culprits include corrupted files or models with more holes than Swiss cheese. Fear not, for Cura often tries to auto-repair these digital dilemmas, smoothing over the rough edges of your files like a skilled potter with clay.
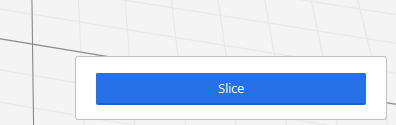
Ready, Set, Slice!
With your OBJ file imported and your model perfectly posed on the virtual build plate, you’re just a hop, skip, and a slice away from G-code glory. But before you hit that magical “Slice” button, remember, every choice from here on out—from layer height to infill percentage—shapes the destiny of your print. It’s like choosing your path in the Forbidden Forest; choose wisely, for the creatures within (or in this case, the settings) can make all the difference in your adventure.
Stay tuned, as we’ll dive into the arcane arts of slicing settings and preparing your masterpiece for the 3D printing stage. And if you’re eager for more mystical knowledge, remember that the secrets to unlocking the full potential of your 3D prints lie within the pages of this comprehensive guide, waiting to be discovered.
G-Code Galore: How Do I Make My Printer Speak This Alien Language?
Now that your OBJ file is sitting pretty on Cura’s virtual build platform, looking ready for its real-world debut, you’re faced with the task of translating its complex geometry into a language your 3D printer understands. This is where the magic of G-code comes into play. But how do you go from a digital model to printer-ready instructions without getting lost in translation?
The Slicing Spell
Slicing, in the world of 3D printing, is akin to translating ancient runes. It’s the process where Cura takes your model and slices it into layers, generating a step-by-step guide for your printer. Think of it as creating a meticulous cake recipe, where each layer needs to be perfectly defined for the final masterpiece to come together.
- Choose Your Settings Wisely: Before you slice, you must choose your settings. Layer height, infill density, print speed—each of these decisions is a thread in the tapestry of your final print. It’s like deciding how much sugar goes into your potion; too much or too little, and the results could be explosive.
- Hit ‘Slice’: With your settings dialed in, it’s time to hit that ‘Slice’ button. Cura will whir and buzz (metaphorically speaking), crunching numbers and plotting paths, until voilà, your G-code is born!
Downloading Your G-Code: A Gateway to Printing
Once sliced, your model’s G-code is ready to be downloaded. This is your golden ticket, the Marauder’s Map that guides your printer’s every move. Downloading your G-code is as simple as clicking ‘Save to File’ or, if your printer is connected, ‘Print via USB’. Just like that, you’re one step closer to bringing your creation to life.
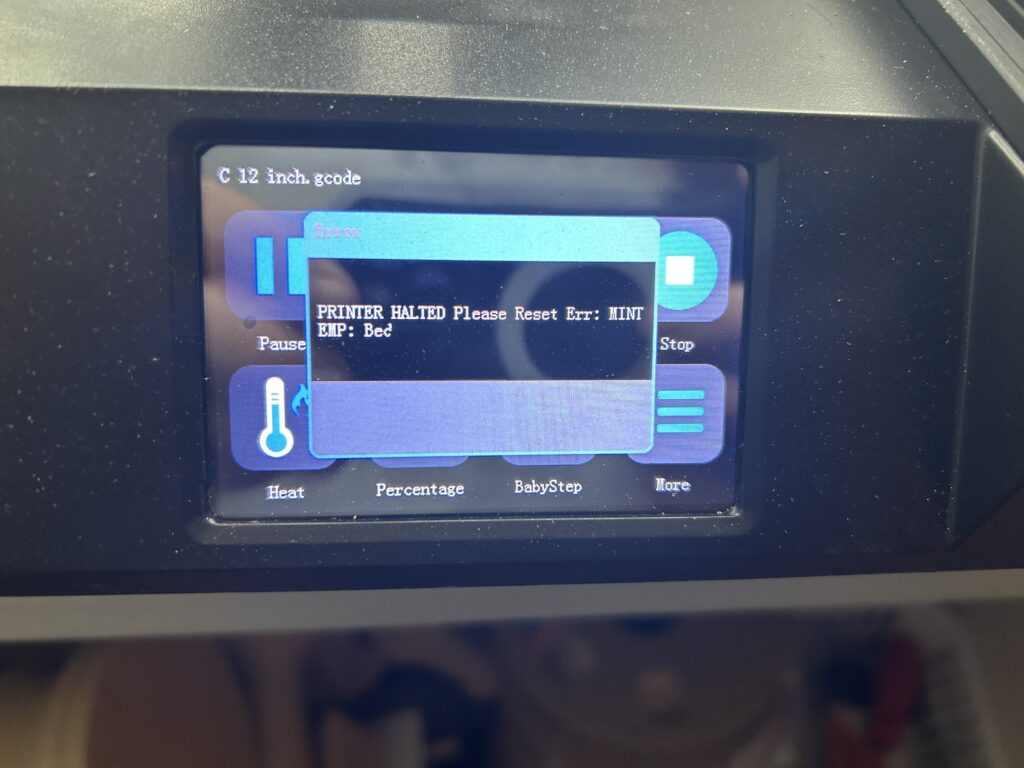
But What If My G-Code Speaks Gibberish?
Not all G-code is created equal, and sometimes what comes out is less ‘Felix Felicis’ and more ‘Draught of Living Death’. If your print starts looking like it’s been hexed, it might be time to revisit your settings in Cura. Perhaps your print speed was too fast, or your layer height too ambitious. Adjust, slice again, and watch as your print transforms from a bubbling cauldron of despair into a phoenix rising from the ashes.
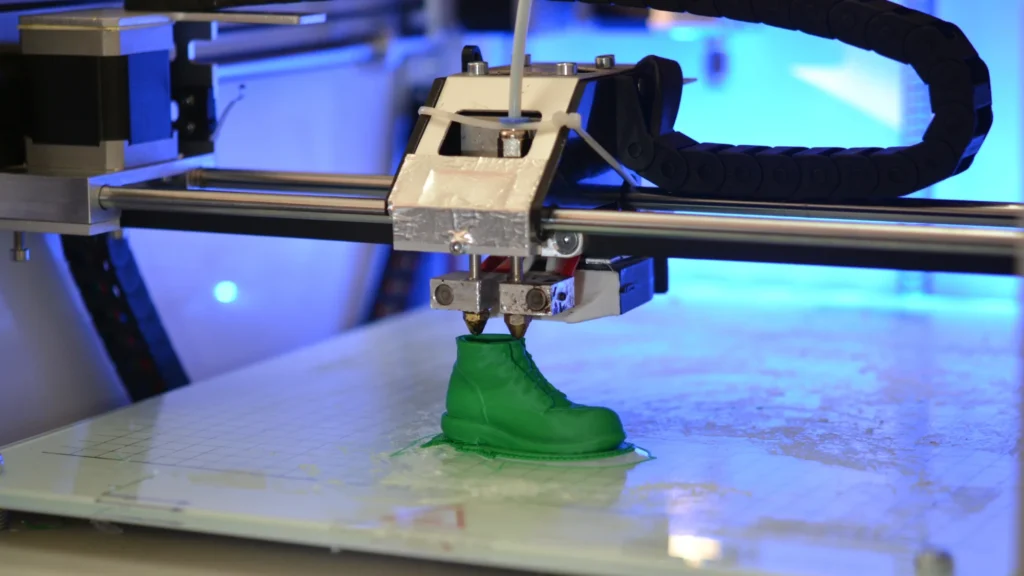
Ready to Print: The Final Countdown
With your G-code now in hand (or in your printer), you stand at the precipice of creation, ready to watch as your digital model takes physical form. This moment, the culmination of all your preparation, is where the true magic of 3D printing happens.
Remember, the path from OBJ to G-code is a journey filled with learning, experimenting, and occasional spells gone awry. But with patience, practice, and a little help from your friendly neighborhood slicing software, you’ll soon be conjuring 3D prints like a seasoned wizard. And should you seek further enlightenment on your quest, venturing into the realms of advanced printing techniques and mystical slicing settings, Cura’s comprehensive guide awaits, ready to unlock new levels of mastery in your 3D printing adventures.
Frequently Asked Questions: Demystifying 3D Printing with Cura
Embarking on your 3D printing journey can often feel like navigating a labyrinth filled with mythical creatures (also known as technical challenges). Fear not! Here are answers to some of the most common queries that bewilder many a newcomer to the art of transforming OBJ files into tangible treasures using Cura.
Can I Use Any 3D Model with Cura, or Does It Have to Be an OBJ File?
Cura is quite the polyglot when it comes to 3D models. While we’ve been focusing on OBJ files, Cura happily converses with STL, 3MF, and even more formats. Think of it as a universal translator for 3D models, ready to slice and dice whatever you throw its way, turning them into G-code your printer can understand.
How Do I Know Which Printing Settings Are Right for My Model?
Ah, the eternal question—akin to asking, “How many licks does it take to get to the center of a Tootsie Pop?” The answer is less about a one-size-fits-all solution and more about understanding the unique needs of your model and printer. Start with Cura’s recommended settings for a balanced approach, and experiment from there. Layer height, infill, and print speed can all vary depending on the complexity of your model and your desired finish. Download Cura is a veritable encyclopedia of knowledge for honing these settings to perfection.
My Print Looks Like a Potion Gone Wrong. What Did I Do?
Do not despair! Even the best wizards have seen their spells fizzle. In 3D printing, a mishap could be due to a plethora of reasons: temperature tantrums, speed snafus, or bed adhesion bewitchments. Take a deep breath, consult the sacred texts (a.k.a. the Cura user manual and online forums), and adjust your settings. Sometimes, the solution is as simple as slowing down the print speed or increasing the temperature. Remember, every failed print is a stepping stone to mastery.
Is There a Way to Preview My Print in Cura Before I Commit to Printing?
Absolutely! Cura offers a magical feature known as “Layer View.” After slicing your model, switch to Layer View to get a sneak peek of how your printer will interpret the G-code, layer by mystical layer. It’s like having the power to foresee the future, allowing you to spot potential issues before they manifest in the physical realm.
I’ve Heard Tales of Custom Supports. Should I Be Using Them?
Custom supports are like the secret spells of 3D printing—used by wise wizards to prevent overhangs from drooping and intricate models from collapsing. Cura gives you the power to add supports where necessary, giving your prints the stability they need without wasting material. It’s a balancing act, deciding where supports are truly needed, but with practice, you’ll learn to place them with the precision of a potion master measuring out dragon scales.
As an Amazon Associate we earn from qualifying purchases through some links in our articles.